HOW I WORK
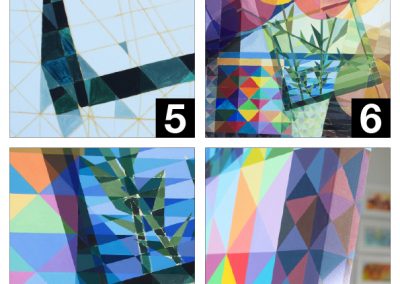
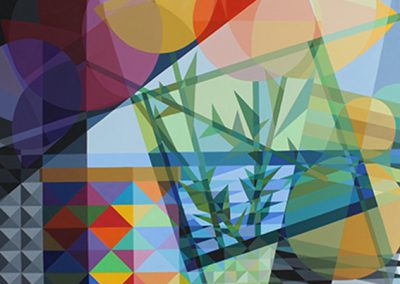
Painting Title – Big Happy
This painting was conceived after another painting called Kitchen Chat was completed. This, much larger painting, I wanted to do with less connection to reality.
Step 1 – I had very strong but rough concept in my head & really had no need to develop the sketch further.
Step 2 – The image is drawn straight onto the canvas using a water coloured pencil. This is where I develop the structure and balance of the painting.
Step 3 – Using a wet brush I draw carefully along the base illustration lines I wish to work with. After they dry, I rub off as much of the residual coloured pencil as possible with a Knetgummi art eraser.
Step 4 – I now start to work out the colour I am going to use by painting small parts of the painting to determine not just the colours but the weight and hues that I wish to use.
Step 5 – As you can see, this is done carefully and the paint is thin at this stage.
Step 6 – I do the whole painting roughly dropping in the general colours and refining the shapes and patterns as I go.
Step 7 – Then I prepare to repaint the whole canvas with care, detail and exact colours and refining each flat, matt, colour against the next. This will sometimes mean I will over paint some colours many times to push and pull against the colours surrounding it.
Step 8 – If the canvas is not being framed I will carefully continue the image around the edge of the canvas.
When the painting is completed I then use a quality matte spray varnish to fix the paint.
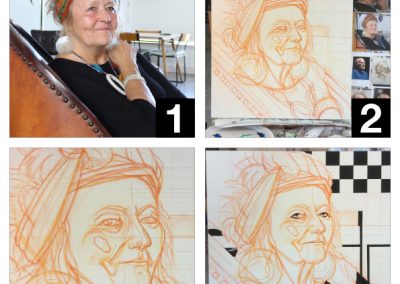
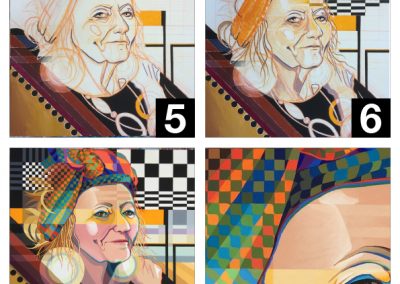
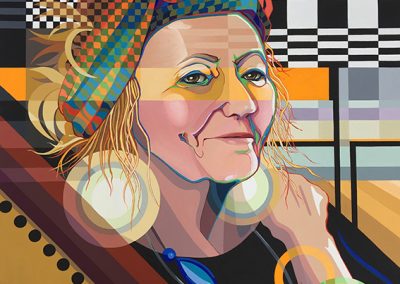
Painting Title – Brenda
This painting was done for the Great Southern Portrait Prize in Foster, South Gippsland. The subject had to be someone local to the area and painted within the last 12 months.
I chose Brenda after she told me about the work she was doing on the renovation of an old home for families to have a holiday after suffering the loss of a child to SIDS.
Step 1 – The first sitting where I took a number of photos and did detailed sketches.
Step 2 – A detailed realistic drawing is applied straight onto the canvas using a water coloured pencil. This is where I develop the structure and many of the details I am going to include in the painting.
Step 3 – Using a wet brush I draw carefully along the base illustration to retain the lines I wish to work with. After they dry I rub off as much of the residual coloured pencil as possible.
Step 4 – I now start to paint some of the darker areas to establish the ‘shape’ of the image and help refine the colours I am going to use.
Step 5 – As you can see, this is done carefully and the paint is thin at this stage. I am also starting to create the patterns contained in certain areas of the painting.
Step 6 – I do the whole painting roughly but very carefully, dropping in the general colours and refining the shapes and resolving patterns and problem areas.
Step 7 – Then I repaint the whole canvas with care, detail, the exact colours and refine the flat matte colour against the next. This will sometimes mean I might over paint some colours many times to establish a push and pull effect and balance against every colour and shape with what is surrounding it.
Step 8 – When the painting is completed I then use a quality matte spray to fix the paint. This painting would take approx 100 hours of work.


